Scratch – Introduction to Scratch : Online Course

| Program Sprites |
The sprites is a white area located below the stage. This area contain all objects or characters that perform actions and manipulate in a project using a blocks, these objects or characters are known as Sprite.
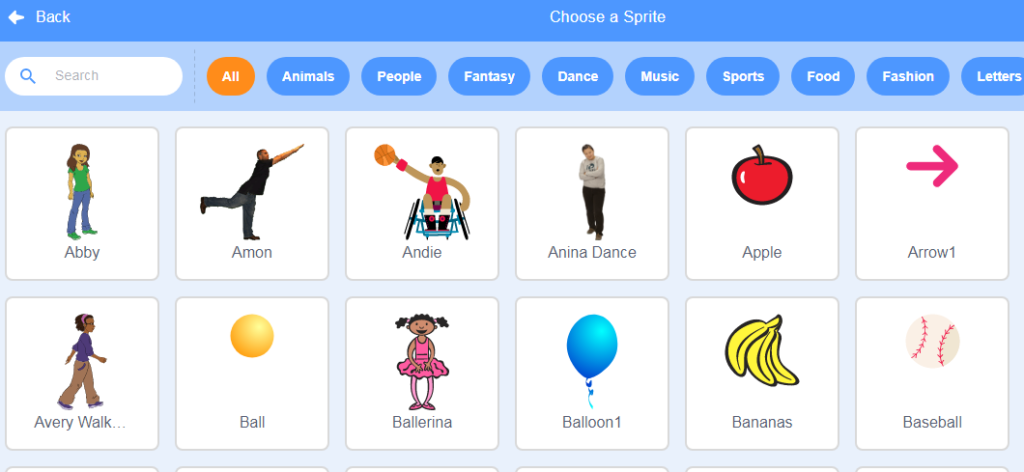
This Sprites, either user-created, uploaded, or found in the sprites library, So you can easily add a prebuilt sprite or create a new sprite as per your requirement.
There are many free sprites already available in store, you can choose any of them or can paint a new sprite or upload any other sprite. Sprites can be controlled by multiple scripts.
Each sprite here has its own scripts, different costumes, and sounds, and can move on their own. You can easily change the current sprite by clicking on a different one.

New Sprite Button
When you start a new Scratch project it begins by default with a single cat sprite. To create new sprites, click on the buttons. It contains list has four buttons for creating sprites. They are:

The search button allows one to choose a sprite from the library.
The paintbrush button creates a blank sprite with an empty costume.
The surprise button creates a random sprite.
The upload button allows one to upload a sprite from the computer.
Sprite List
It displays thumbnail for all sprites in a project. The name of each sprite appears below its thumbnail. For each sprite, you can see the sprite’s name, scripts and costumes.

You can then add/choose a new sprite from the sprite gallery. After selected sprite is highlighted and outlined in blue in the Sprite List.
Delete Sprite

There are several ways to delete your sprite:
- Right click on the sprite and choose Delete from the menu.
- Click the scissors above the stage, and then click Sprite.
- Right click on the sprite in the sprite list and choose Delete from the menu.
Current Sprite Info
The sprite info contains a sprite’s name, x-y position (horizontal and vertical position), appearance (show, hide), size and direction. In the place of sprite1 you can type in a new name. The sprite’s direction indicates the position of the sprite and which direction the sprite will move to. Add x and y coordinator for change the position of sprite. You can increase and decrease the sprite size as per requirements.
The blue arrow show the sprite’s direction. This direction will be anticlockwise or clockwise just like watch. If you double-click on the sprite to set the direction back to its original state (direction=90).

| Code Blocks/ Block Palette |
- The block palette is an area of the Scratch User Interface located to the left of the Code Area.
- It is the area where all categories of the blocks available for you to use in your programming.
- Note that the blocks palette will change depending upon the current block category.
- When you select a new block category, the blocks palette will change to reflect the new options available.
- Blocks can be clicked and dragged into the scripting area via any pixels on the block. Each block has different shape.
Tabs
It has three tabs. Tabs name are the code, costumes, and sounds
- Code Tab: The block palette that helps in building the functionality of each sprite. They are color coded.
- Costumes Tab: It contain more than one of cloths, here sprite can take more than one look in the program. The sprite look is called a costumes.
- Sounds Tab: To gives you the option to add sounds to your project.

Different color blocks do different things:

Blocks are sorted into categories:
- Motion: move a sprite
- Looks: change costume/color
- Sound: play instrument, song
- Pen: draw lines on stage
- Control: have sprite make ‘decisions’
- Sensing: See/hear/touch objects
- Operators: mathematics and text
- Variables: give sprites memory
| Scripts Area/ Coding Area |
Scripts /Code Area is the place where the programmer writes some Script or story for the Sprite. So this script tells the characters what to do or say. Programmer first decide which type of block is required for this scripts then blocks from the block palette are dragged into the scripts / code area. It is the place where programmer actually assemble your code using blocks so the script area displays a stack of blocks connected to each other. After complete script then you to run a block, click on it.
Note: Programmer can add or delete as many sprites as you want.
| Extention |
Scratch 3.0 adds a new category of blocks in a block palette known as Extensions. this extension icon is placed in the bottom-left corner of the Scratch Editor. If you click on the icon, It will open a new page that shows several extensions like Music, Pen, Text-to-speech etc. If you choose any of them, it will create a new Category in the blocks-palette.
आशा करता हूँ, कि यह आर्टिकल आपको पसंद आया होगा तो सोच क्या रहे हैं अभी इसी वक्त इसे अपने दोस्तों के साथ सोशल मीडिया पर Share करें।
Thanking You………………धन्यवाद………………..शुक्रिया………………..मेहरबानी…………………..
Read More


